“How to Create a Home VO Studio on a Budget”
By: George Whittman
From the Stage 32 Blog
In 2021 you Need a Voiceover Studio in Your Home
Many voice actors I work with have been working from their homes for most if not their entire careers. However, there are a large number of actors in the major markets who didn’t need to take that step due to the nature of their work or their locations. Thanks to a pandemic that’s forced us all to stay home, a new normal is forming for ALL forms of voiceover work: The voice actor must have a professional sounding home studio. Thankfully, it doesn’t have to be expensive, only sound that way! I’ll share my favorite tips in my inaugural article for Stage 32. Hello, it’s nice to be here!
Criteria for a Home VO studio that Sounds Professional
There are several aspects of a voiceover recording that will give the impression of being recorded in a professional studio, even if it’s just your walk in closet. I’ll elaborate further down in the post, but for those TL;DR folks:
- Acoustical environment: Your voice has a sound that is clear of reflections, reverb, and resonances. You don’t sound like you’re “in a box” or “in a tube”.
- Noise levels: The “noise floor” of your recording is low enough so as to not distract the listener from your voice at any time. The “room tone” when you’re not speaking has very low levels of white noise, hum, buzz and rumble. There are no random noises from inside or outside your home from machines, people, or animals.
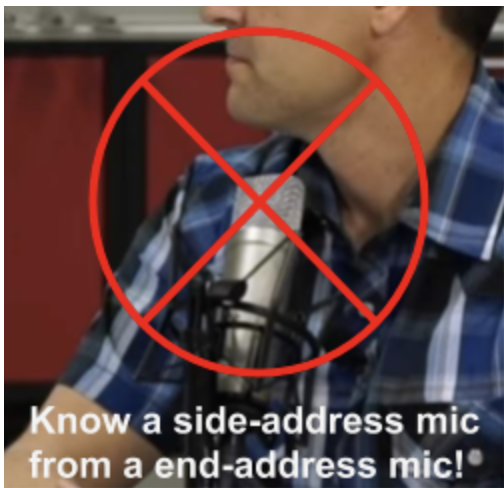
- Mic technique: The mic is in the correct position and distance from your mouth to give a clear and focused picture of your voice. Not too close to pickup plosive pops, not too far to sound distant and diffuse, and with the mic’s diaphragm aimed at the sweet spot between your mouth and chest.
- Mic choice: Microphones for voiceover have never been more affordable, but don’t get them confused with dynamic broadcast or podcast microphones. Stick with condenser mics, as dynamic mics aren’t appropriate for professional voiceover work.
- Equipment quality: Even the most affordable gear in 2021 can be free of distortion and pick up your voice accurately. Expensive can also mean more difficult to use, higher maintenance, and too sensitive to background noises.
1. Acoustical Environment
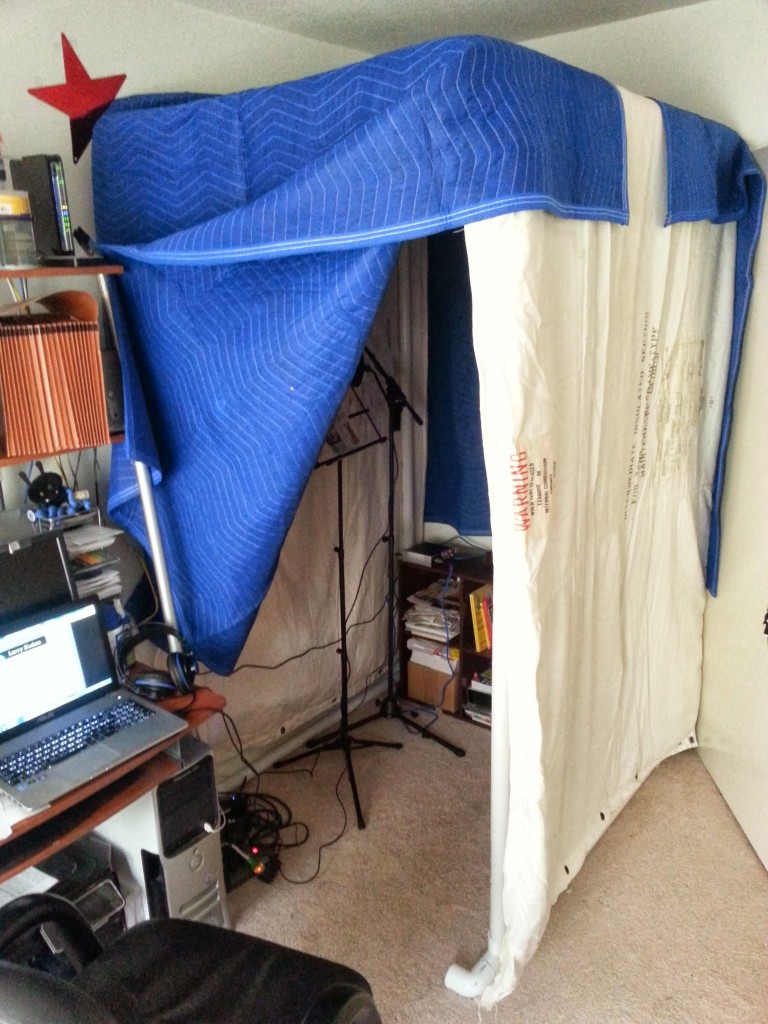
Creating a home voiceover studio can be a fun and creative experience! With a bit of resourcefulness and ingenuity you can create a voiceover “booth” in a closet, alcove, cubby, or corner of your bedroom. If you are fortunate enough to have one, a walk in closet is an ideal recording environment. As seen in the first image of this post, clothing is incredibly effective at controlling reverb and resonances that occur in small spaces thanks to its thickness and density.
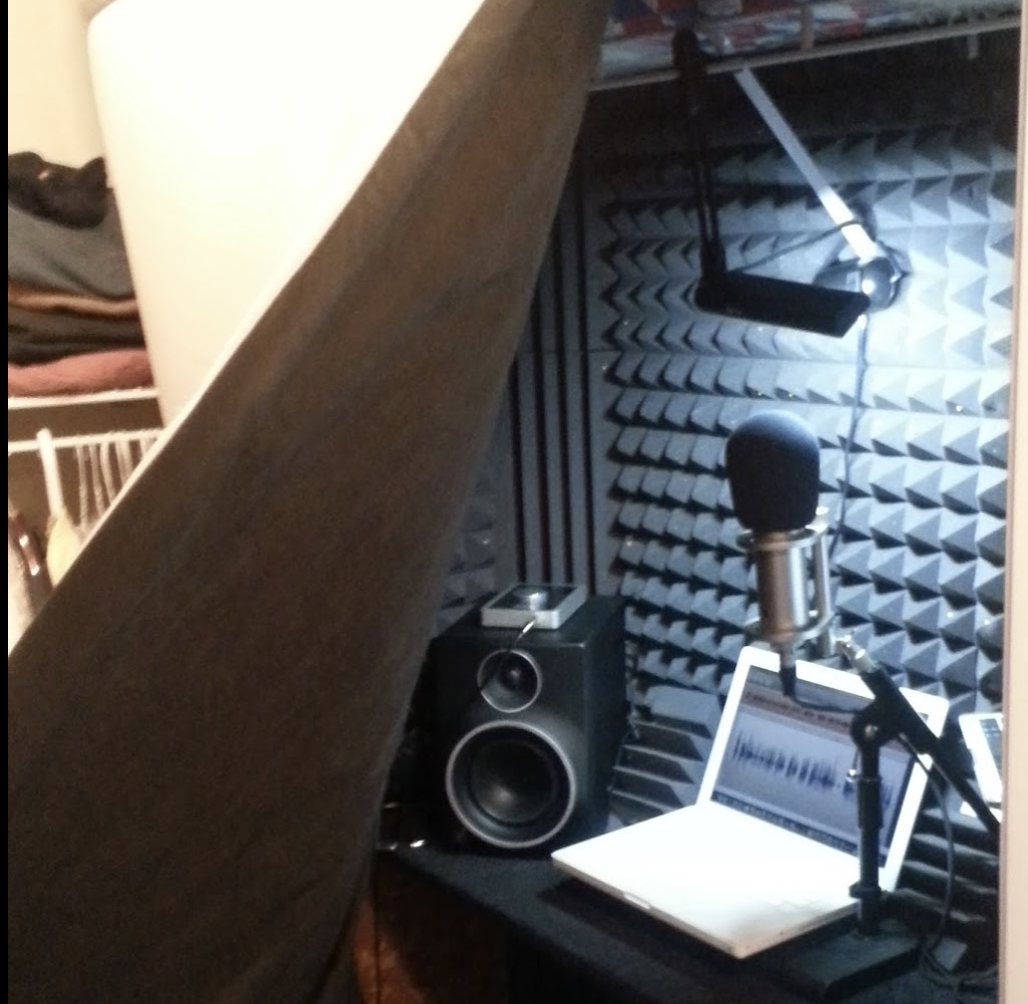
If your closets are too small to stand inside comfortably with your clothes surrounding you, try a new approach and use the closet as a place for the equipment while you stand facing inward. For this to work well you’ll need to line the inside of the closet with acoustic treatment, such as acoustic foam or panels. Secondly you need to hang a heavy blanket or curtain behind you to stop the reverberation from the room behind you from reaching the microphone.
2. Noise Levels
For many the most difficult part of recording at home is avoiding noise. Noise sources are many, and you’ll discover more than you ever imagined the first time you record and playback some audio. The first line of defense is to filter out “rumble”, the low frequency junk that shows up as a wavy line in your recordings when you’re not speaking. Some microphones have a “low-cut” switch to engage, but if not your recording software can be used to create a similar effect to clean up the waveform.
To deal with other constant noise sources, options include turning off appliances (HVAC, refrigerators, aquariums), moving noisy PC’s and hard drives away from the mic, and choosing a room that faces away from the street. Random noise from inside the home from family and pets takes a lot of understanding and communication. Try a special light you turn on only when recording! Covering windows with heavy blackout curtains can help a little, but it might take more aggressive measures for some in urban areas. Noise from leaf blowers or airplanes penetrate almost any defense, and require patience to let them pass.
3. Mic Technique
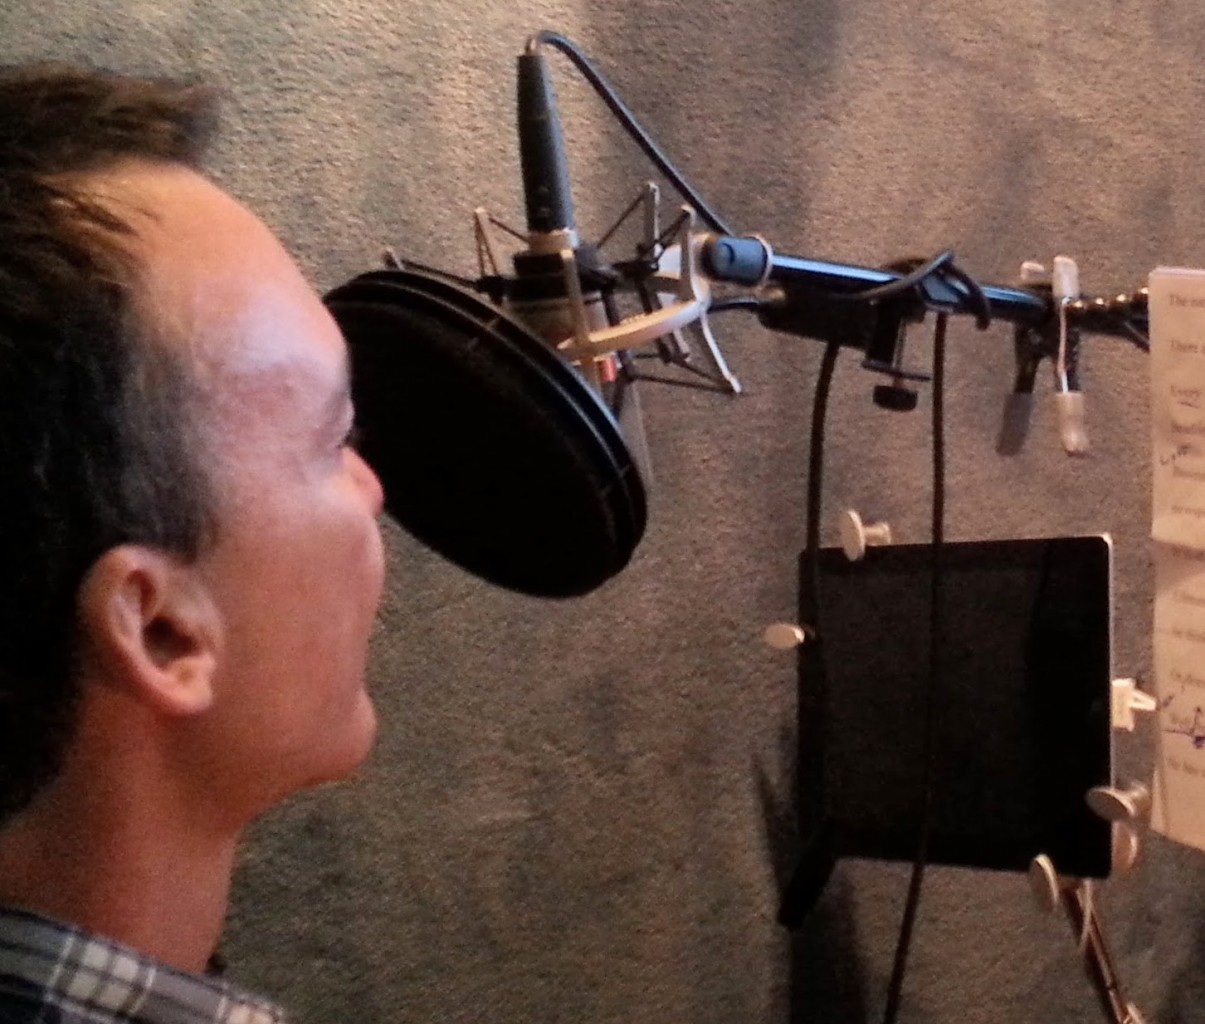
You can get everything I’ve mentioned right and still get amateur quality voiceover recordings if your mic placement is off. Keeping a distance of 4-8” away from the mic will give the best results in a small space. As a guide of distance use a range somewhere between a fist’s width and a hand span away.
Aiming the capsule toward the chin area will help the mic pickup your voice and chest resonance.
Placing the mic out of your copy sightline will prevent eye and neck strain. Shifting the mic 2-3” up or sideways will keep it out of the “pop zone” so plosives won’t be picked up. Remember, you don’t need to face the mic directly, the mic needs to be facing you.
Avoid backing far away from the mic when projecting for a character, but rather reduce the gain on your audio interface (pre-amp) to compensate for the loudest passages of your script and keep it that way throughout the session. The goal is keeping that clean, focused voice sound intact so the engineer can manipulate it easily during the mix.
4. Mic Choice
We’re lucky in 2021 to have a huge array of affordable microphones capable of recording excellent sounding voiceovers. Whether you choose a USB mic, or a professional XLR studio mic and interface, here are a few criteria to look for and mic models I find give consistent performance you can count on year after year.
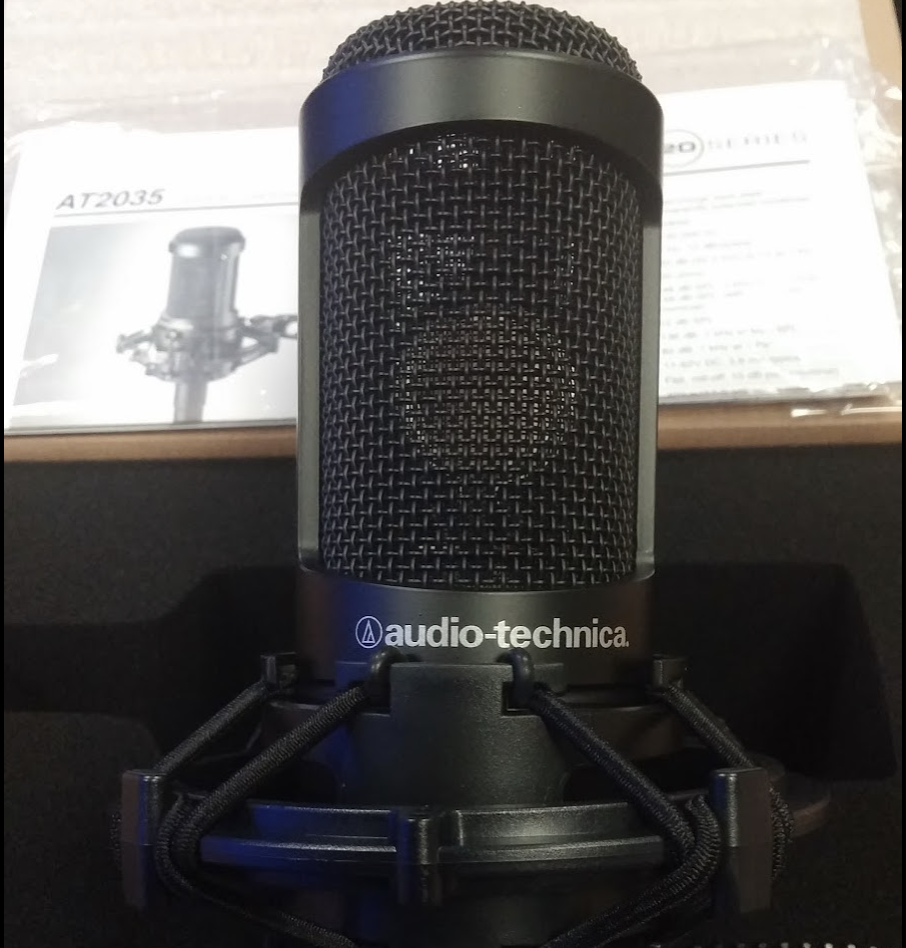
My best recommendation is to choose a studio condenser microphone with an XLR connection that uses “phantom power”. This type of mic is what’s used in every commercial recording studio, but it doesn’t have to be one of the big names to get pro sound. At the budget end a favorite is the MXL990, under $100! Going up from there, favorites of mine include the Audio Technica AT2035 (the low-cut switch is very handy), the Rode NT1, the Rode NTG4, and the $400 Vanguard V4 (a multi-pattern mic). Each has unique features and design aspects that make them special, but they all sound amazing on a wide range of voices because they’re free of coloration, noise and distortion. (links at the end of the article!)
USB mics often are considered not for professional use, but that’s simply an inaccurate and elitist engineer’s opinion. While not my preference, if your space is so cramped that it’s difficult to find room for an interface, or you’re looking for the ultimate in portability, a USB mic can be used. Look for models that have a proper gain control on the mic. A bonus is to also have a headphone jack for “zero latency monitoring” if you must wear headphones while recording. The perennial favorites are from Apogee, including the MiC and Hype models. Avoid the Audio Technica AT2020 USB due to a high “self-noise” that reveals itself as hiss in your recordings.
5. Equipment Quality
Once you choose a professional XLR microphone you’ll need some other equipment in your studio to support its use. The primary piece is the audio interface, which contains the mic pre-amp. This unit connects to the mic with an XLR cable, provides phantom power (P48), increases the weak signal from the mic, converts the signal to digital for recording, sends it to the computer over a USB cable, monitors the mic signal in headphones, and plays back the audio from the computer with as little noise as possible. That’s a lot of functions in a small box, but it’s possible to buy an interface like the sub-$150 Focusrite Scarlett Solo that does all of those tasks without issues. The Focusrite Scarlett 2i2, Steinberg UR12, and Shure X2u are other affordable and easy to use options.
Use a sturdy and adjustable mic boom stand on the floor that won’t easily topple over or sag under the weight of your microphone, available typically from $50-$75. Try to avoid a desktop stand as they tend to direct reflections and vibration from the desk into the sensitive mic capsule.
Choose headphones over speakers when editing your voice tracks. Speakers will not provide an accurate reproduction of your voice unless you’ve acoustically tuned your studio for monitoring. What’s more they take up a lot of space, are costly, disturb your family and neighbors, and create feedback problems if used incorrectly. Headphones for professional studio use are preferred, such as the Audio Technica ATH-Mxxx series and Sennheiser HD280pro. Avoid music-sentric headphones such as those by Beats and Bose as they won’t provide accuracy.
_________________________________________________________________________________________
Where do you go from here? Head over to my Stage 32 page at GeorgeThe.Tech!
For more in-depth definitions of some of the technical terms mentioned in this article, check out my audio glossary.
Links to Microphones and equipment mentioned in this article: MXL990, AT2035, Rode NT1, Rode NTG4, Vanguard V4, Focusrite Scarlett Solo, Focusrite Scarlett 2i2, Steinberg UR12, Shure X2u, mic boom stand, Audio Technica ATH-Mxxx, Sennheiser HD280pro
About George Whittam

Since 2005 George has dedicated his life to serving the technical needs of voice actors and recording studio owners. In August 2017 George launched GeorgeTheTech.com to assist anyone who records voiceover with tech support, training, studio design, and audio processing templates.
He is globally considered a top authority in voice-over recording technology, investing thousands of hours researching studio design, recording equipment, and creating training materials for voice actors. Among his many successful clients are the late Don LaFontaine, Bill Ratner, Melissa Disney, Randy Thomas, Joe Cipriano and Scott Rummell.
George is producer and co-host with Dan Lenard of the live webcast Voice Over Body Shop at VOBS.TV
George is also co-host of podcast The Pro Audio Suite.
You’ll find George all over social media, but he spends most of his time answering questions in the myriad Facebook Groups for VO and audio technology.
Instagram: @georgethetech

